How to Set Up a Telescope for the First Time — Step-by-Step Guide
Telescope Advisor Logo Telescope Advisor
Star-filled night sky — setting up a telescope for the first time

Beginner’s Guide · Step-by-Step

How to Set Up a Telescope for the First Time

From unboxing to your first Saturn view in 6 clear steps. Works for reflectors, refractors, Dobsonians, and smart telescopes alike.

6

Steps

45 min

First Setup

Any

Scope Type

Tonight

Ready to Observe

By Telescope Advisor Editorial Team Published: Updated: Editorial Standards

Before You Start: Three Rules That Matter

Most beginner frustration comes from skipping preparation. Follow these three rules and your first session will be rewarding rather than baffling.

🌙 Dark-adapt your eyes first

Stay outside in the dark for 15–20 minutes before observing. Your pupils dilate fully and you’ll see far more. Use a red LED torch only — white light kills night vision instantly.

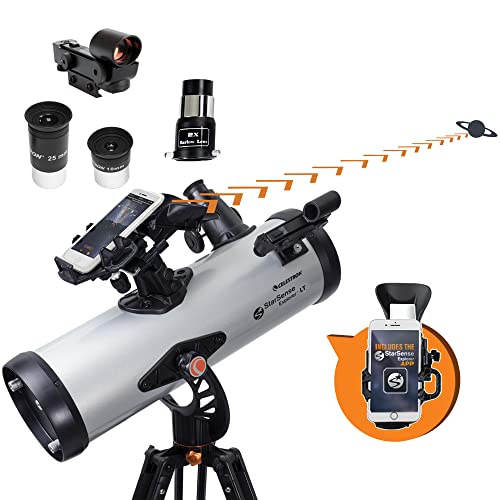
🔭 Always start low-power

Use your largest eyepiece (e.g. 25mm or 32mm) first. It gives the widest view and brightest image, making targets far easier to find and centre before switching to higher magnification.

🌔 Start with the Moon

The Moon is the ideal first target — bright, easy to find, and packed with crater detail. If the Moon isn’t up, Jupiter or Saturn are the next best choices.

What You’ll Need Before You Start

Check the box for all components and have these items ready before going outside:

📦
Telescope tube, mount & tripod
Confirm all parts are in the box against the manual’s parts list before setting up outside.
🔬
Eyepieces (at least 2)
A 25mm for wide low-power views and a 10mm for closer detail. Most beginner scopes include both.
🎯
Finderscope
A small sighting tool (red-dot or crosshair) that mounts on the tube. Essential for locating targets quickly.
🔴
Red LED torch
Critical for reading charts without ruining night vision. Never use a white torch during a session.
📱
Star chart or phone app
Stellarium (free, iOS/Android) shows real-time sky maps. SkySafari is the best paid option.
📋
Your telescope’s manual
Every scope has unique adjustment screws and balance points. Keep it with you outside.
1

Assemble the Tripod & Mount

The mount and tripod are your telescope’s backbone. A shaky base means shaky views — this step is worth doing carefully.

  1. 1Extend each tripod leg to roughly waist height. Too low strains your back; too high wobbles. Lock the leg clamps firmly.
  2. 2Level the tripod on flat ground. Grass dampens vibrations better than concrete or paving.
  3. 3Attach the mount head. Alt-azimuth mounts (up/down + left/right) bolt directly to the tripod head. Equatorial mounts have a polar axis — point it roughly north using a compass.
  4. 4Slide the counterweight (equatorial mounts only) onto the Dec. rod but leave it loose — you’ll set the position in Step 5.
Pro tip: Set up away from streetlights, walls, and windows. Even a modest back garden beats a lit driveway for views.
2

Attach the Telescope Tube

The telescope tube houses the optics. Mounting it securely is critical — any flex at this joint shows up as vibration in the view.

  1. 1Locate the dovetail bar — the metal rail on the underside of the tube. This slides into the saddle clamp on top of the mount.
  2. 2Slide the tube into the clamp and tighten the saddle screws until the tube is snug with no wobble. Firm — not overtightened (you risk stripping threads).
  3. 3Test for movement by gently pushing the tube. No shift? You’re good. Still wobbles? Tighten another quarter-turn.
Dobsonian owners: Tabletop and floor-standing Dobsonians (like the Sky-Watcher Heritage 130P) don’t use a tripod — the rocker box IS the mount. Unfold and place on a stable flat surface. Skip ahead to Step 3.
3

Install & Align the Finderscope

The finderscope is your aiming assistant. Without it, pointing a narrow telescope tube at invisible targets is pure guesswork. Always align it during daylight before your first night session.

  1. 1Attach the finderscope to its bracket on the tube. Most snap in or screw on — consult your manual for exact placement.
  2. 2Pick a distant daytime target — a chimney, TV aerial, or sign at least 100 metres away.
  3. 3Centre it in the main eyepiece (25mm) using the mount’s slow-motion controls or by gently pushing the tube.
  4. 4Without moving the telescope, look through the finderscope and adjust its alignment screws until the same object is centred in the finder’s crosshair or red dot. Small turns — go slowly.
  5. 5Test alignment: move the scope slightly, re-centre in the finder, then verify the main eyepiece is also centred. If both agree, you’re done.
Night alignment (if needed): Use a bright star like Vega, Arcturus, or Sirius. Exactly the same process — centre in the main eyepiece first, then adjust finder screws to match.
4

Insert & Focus the Eyepiece

Eyepieces control magnification and field of view. Choosing the right eyepiece first — and learning to focus before dark — makes everything else easier.

  1. 1Start with the lowest-power eyepiece — the one with the highest mm number (typically 25mm or 32mm). It gives the widest, brightest view and is the most forgiving for beginners.
  2. 2Remove the front lens cap from the telescope’s aperture. This sounds obvious — it’s the most common beginner mistake.
  3. 3Slide the eyepiece into the focuser barrel and tighten the set-screw gently. Do not overtighten — you risk scratching the eyepiece barrel.
  4. 4Focus during daylight first. Point at that distant target and slowly turn the focus knob until it’s sharp. Note which direction (clockwise vs anticlockwise) brings things into focus.
Focus tip: If the image is completely blurred, the focuser is at an extreme position. Start from one end and turn slowly all the way through — at some point it will sharpen. Never force the knob past its physical stop.
5

Balance & Align the Mount

A balanced telescope moves smoothly and stays where you point it. An unbalanced scope drifts by itself and fights your movements.

Alt-Azimuth Mounts (most beginners)

  1. 1.Loosen the tube clamp.
  2. 2.Slide the tube forward or back until it holds horizontal when you release it.
  3. 3.Retighten the clamp. No polar alignment needed — alt-az mounts are ready to observe.

Equatorial Mounts (EQ2, EQ3, HEQ5 etc.)

  1. 1.Loosen the RA clutch. Slide the counterweight until the tube doesn’t tip east or west. Retighten.
  2. 2.Loosen the Dec clutch. Adjust the tube until it doesn’t tip north or south. Retighten.
  3. 3.Point the polar axis at Polaris (the North Star) for basic tracking. A rough alignment is adequate for casual visual observing.
6

Find Your First Target — Start with the Moon

The Moon is the ideal first target for any telescope. It’s bright, easy to find in the finderscope, and packed with crater detail that rewards any aperture. If the Moon isn’t up tonight, use Jupiter or Saturn.

🌕 The Moon

Locate in the finder, centre in the 25mm eyepiece, then focus slowly. At 50×–100× craters pop into sharp relief. An unmissable first target on any clear night.

🪐 Saturn

Steady, cream-coloured — doesn’t twinkle like a star. Rings visible at 40×+. Use the 10mm eyepiece for ring detail. Titan (largest moon) shows as a nearby dot.

🌟 Jupiter

Brightest “star” in the sky (when visible). At 50× you’ll see four Galilean moons as tiny dots. At 100× cloud bands become visible across the disk.

First night checklist

  • Telescope assembled, finderscope aligned, 25mm eyepiece inserted and focused
  • Go outside 20 minutes early to dark-adapt your eyes before observing
  • Red torch only for reading charts — no white light during the session
  • Start with the Moon or a bright planet — don’t hunt faint deep-sky objects on your first night
  • Dress warm — stationary observing gets cold quickly even on mild nights

Common Setup Mistakes to Avoid

Leaving the lens cap on
Always remove the front aperture cap. Sounds obvious — you’ll forget it at least once.
Skipping finderscope alignment
You’ll spend the whole session guessing. Always align during daylight before your first night out.
Testing indoors or through windows
Glass distorts light and room heat creates shimmering. Always set up outside.
Cranking the focus knob too fast
Small, slow turns — especially at high magnification. Fast turns overshoot the focus point every time.
Starting at high magnification
High power = tiny field of view = nearly impossible to find targets. Always start with the 25mm eyepiece.
Not dark-adapting before observing
Walk outside from a lit room and your night vision is useless for 20 minutes. Go out early.

Frequently Asked Questions

How long does it take to set up a telescope for the first time?

Most beginners assemble and align a telescope in 20–45 minutes on the first attempt. Once familiar, a full setup takes 10–15 minutes. Dobsonian tabletop scopes (like the Sky-Watcher Heritage 130P) take under 2 minutes — unfold, place on a table, insert eyepiece.

Why can’t I see anything through my telescope?

Check in order: (1) front lens cap still on, (2) eyepiece not fully inserted, (3) focus knob at an extreme position — turn it slowly from one end all the way through until the image sharpens, (4) finderscope not aligned with the main tube. Start with a daytime terrestrial target to master focusing before nighttime use.

Which eyepiece should I use first?

Always start with the lowest magnification eyepiece — the one with the highest mm number (e.g. 25mm or 32mm). Low magnification gives a wider field of view, brighter image, and is far easier to focus and point. Only switch to higher magnification after you’ve found and centred your target.

Do I need to polar-align my telescope every time?

Only if you have an equatorial (EQ) mount and plan to take long-exposure photographs. For casual visual observing, a rough polar alignment is fine. Alt-azimuth mounts (used on most beginner telescopes) require no polar alignment at all.

How do I align the finderscope?

During daylight, point the main telescope at a distant stationary object and centre it in the 25mm eyepiece. Without moving the telescope, look through the finderscope and adjust its screws until the same object is centred in the finder’s crosshairs. Once aligned, both tubes point at exactly the same spot.

Related Guides